Optipro Systems
Universal Robots and New Scale Robotics Automate Quality Control in Precision Optics Manufacturing
01 THE SHORT STORY
OptiPro Systems, a manufacturer of precision optical fabrications equipment, faced increased customer demand to offer an automated solution that could measure – in-process – the products that OptiPro customers manufacture in its machines. OptiPro found the solution in New Scale Robotics’ Q-Span® Workstation, an Application Kit for small parts measurement powered by a UR3 cobot from Universal Robots.
02 THE CHALLENGE
Based in upstate New York, OptiPro Systems has been developing precision grinding, polishing and metrology instruments for the optics industry since the late 1980s. Increasingly, the company’s customers have started requesting turnkey solutions. “Instead of customers purchasing individual machines and equipment piecemeal for their manufacturing solutions, we can now handle the whole process, supplying them with a cell that both measures and manufactures the blanks, and turns them into a final work piece,” says David Mohring, Metrology Coordinator, OptiPro Systems. Quality control is crucial since a majority of OptiPro customers manufacture parts for the medical and military sectors requiring 100% inspection.
03 THE SOLUTION
OptiPro Systems had already implemented collaborative robots from Universal Robots internally to tend grinding and CMM machines making prototypes. When New Scale Robotics came out with the Q-Span® Workstation Kit, OptiPro took note. “We saw a unique opportunity to offer a safe, user-friendly solution for in-process measurement powered by cobots we already felt comfortable with,” says Kyle Wood, Optics Fabrication Supervisor at OptiPro Systems.
THE Q-SPAN® WORKSTATION KIT
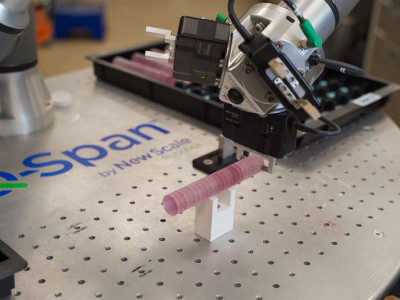
Q-Span® Workstation is a UR+ Application Kit, which means it has been tested and certified to integrate seamlessly with UR cobots – in this case UR’s tabletop cobot, the UR3. The Q-Span® Workstation Kit includes robotic gripper-calipers, sample parts and accessories, and a versatile workstation cart that moves easily about the facility. OptiPro now provides the Q-Span® Workstation Kit as part of complete machining cells, incorporating grinder, polishers, ands metrology stations. When parts come out of an OptiPro grinding machine, Q-Span® Workstation immediately measures the parts in a pass/fail scenario. If parts pass, they move on to the CMM machine for further measurement.
REDUCES SCRAP OF PRECIOUS MATERIALS
Measuring the parts in-process is vital to the manufacturing process says Mohring: “Instead of producing a bunch of parts that do not get measured until later, in-process measurement catches issues right away, which reduces scrap and makes sure we don’t continue the manufacturing process while we’re making bad parts.”
Mike Cahill, Mechanical Engineer at OptiPro Systems explains how Q-Span® Workstation for example can measure glass cylinders coming out of the company’s OptiSonic grinding machine. The cylinder is made by a coring drill that like a mini-jack hammer oscillates through a large stack of glass. “OptiSonic technology significantly prolongs tool life, but it is inevitable that the diamond tool drill will wear over time as part of the grinding process, so the actual work piece size resulting from that fabrication process will vary,” he says. “Having the Q-Span® Workstation immediately measure core thickness of each cylinder enables us in an unmanned fashion to catch out-of-tolerance issues right away and change drills or feed rate if need be.”
This means reducing scrap of precious materials. Kyle Wood gives an example of just how precious: “Several of our customers use germanium, which is worth more than gold in raw weight, so we’re talking thousands of dollars in savings,” he says, also emphasizing the delicate part handling provided by Q-Span® Workstation. “Using the cobot, our customers now avoid brittle material breaking and sharp edges getting fractured or chipping from manual handling. Q-Span® Workstation enables an unmanned operation that can produce work pieces in the thousands when the lot sizes are large, it would take a manual operator six steps to do what Q-Span® can accomplish in one cycle. Added to that, we take the human variance out of the equation,” he says. “We can also measure a variety of different parts without changing the gripper, which allows us to quickly move from one project to the next.”
FLEXIBLE DEPLOYMENT WITH BUILT-IN SAFETY
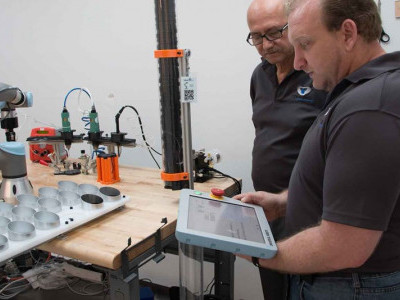
Quinlivan explains that New Scale Robotics chose the UR3 cobot to power the Q-Span® Workstation Kit for several reasons: “The UR3 has a great form factor and provides an open-source platform, enabling us to develop a URCap, which is a software handshake between our system and the robot,” she says, explaining that this makes it possible for the user to program the entire application directly through the UR3e’s own teach pendant that can feed measurement data directly into customer databases.
“You can actually bring Q-Span® Kit right into your facility, and within a matter of hours, have it measuring parts without hiring an integrator to spend hours working to get a hard-tooled robot set in your system.”
OptiPro Systems has worked with a variety of different robots, says Mohring. “The ease of use and collaborative nature of the UR cobot has been instrumental in implementing it into our work cells, we don’t have to spend a lot of time developing techniques and learning different programming algorithms as with some of the other options out there,” he says adding that the fact the UR3e is a cobot enables it to operate alongside employees and fit into existing workflows. “Because of the cobot’s built-in safety, it delivers the advantages of flexible automation without the costs of fixed industrial robots. We do not need to add all the extra guarding and lasers as with traditional robots. We can simply wheel the Q-Span® System between machines; it could be a basic three-axis mill, all the way up to a six-axis simultaneous grinding platform—or a polishing platform—it is flexible enough that we could put it on every single one of our machines.”
PREVENTS BOTTLENECKS IN METROLOGY LABS
Having the Q-Span® Workstation measure in-process at the grinding machine, sorting parts into pass/fail bins, also helps prevent bottlenecks further down the line at the metrology lab explains Mohring: “Catching out-of-tolerance parts right there in the manufacturing cell early in the process without having to send them to a CMM machine in the metrology lab saves a lot of money and time for our customers.” Only parts that pass Q-Span® Kit’s in-process measurement then move on to a CMM machine for full dimensional verification.
“Often in optics manufacturing, there’s a cell setup where there’s a grinding operation, a polishing operation, and then a metrology operation, all within one work cell,” he says. “To not have a person at each machine is a great cost reduction – and in a Covid-scenario with reduced in-house workforce, it’s been a great asset for our customers as they don’t have to have as many people working together within close proximity.”
Adding the Q-Span® Workstation Kit as part of OptiPro System’s turnkey offering has prompted lots of ideas for future projects. “It has also given us confidence in adding an element of innovation to either future or existing production with the UR cobots, which is going to be increasingly important,” says Kyle Wood.


