I got a manual on GM480A series , I dont know if that manual can be applicable for 4801/4802 module , can you confirm....
My guess is that there would be no big discrepancies/differences from 480A to 4801 OPERATION&MAINTENANCE Manual...
Model 480A
Single Channel Control Module
Combustible Gas Applications
Here some notes from the Manual:
To perform a calibration check, use the following procedure:
1. Place the cup from the portable purge calibrator over the sensor.
Figure 7: Portable Purge Calibrator
NOTE: The calibration check mode cannot be entered if the unit is in alarm
2. Enter the Calibration Check mode by pressing and holding the Mode button until the CAL LED flashes (about ten seconds). The unit displays the calibration level. When
Model 480A
18
the CAL LED flashes, release the Mode button. The channel is now in the Calibration Check mode.
3. When the Mode button is released, the display flashes a pair of bars (--) for about ten seconds. The channel’s LED displays flashing digits, for example “0”; apply the test gas to the sensor (open the ON/OFF valve on the cylinder) and wait a few seconds. The display begins to go up scale as the sensor sees the gas. If no gas is applied, the unit returns to the normal operating mode after 6 minutes.
4. The reading stabilizes after 30 to 60 seconds of exposure to the test gas. This response time may increase due to the presence of the Dust Guard, Splash Guard or other sensor accessories.
5. If the sensor sees the gas, the read-out on the display flashes for as long as the channel remains in the Calibration Check mode. The operator should compare the reading with the gas concentration applied and determine if it is necessary to calibrate the sensor.
6. Remove the gas and expose the sensor to clean air. If the gas is not removed within 6 minutes, the channel reverts to a fault condition.
7. Press the Mode button. The calibration level displays for a short time, and the channel exits out of Calibration Check mode.
NOTE: Low and High alarms for the channel are disabled during Calibration Check mode.
3.6 Calibration Mode
NOTE: For better results power up the sensor at least an hour before calibration.
Considering the potential hazard of an explosive level of a combustible gas, General Monitors strongly recommends that the period between calibrations should never exceed 90 days.
It is very important that the owner/operator of this equipment determine the correct calibration schedule for their particular environment. The frequency of calibration may be substantially shorter then 90 days depending on environmental contaminants and conditions. This calibration frequency should follow a regular calibration routine and procedure.
Calibration to the specified gas is initially done at the factory. GMI strongly recommends, that the Model 480A system be recalibrated upon start-up in order to familiarize the operator with the procedure and verify correct operation of the system.
To calibrate the Model 480A:
1. Make sure the calibration gas is the same concentration as the user specified calibration level.
2. Make sure the sensor is seeing clean air.
3. Enter the Calibration mode by following the same procedure for entering the Calibration Check mode. Press and hold the Mode button until the CAL LED
Model 480A
19
becomes steady, approximately fifteen seconds. When the CAL LED is steady, release the Mode button. The display shows flashing bars (--) for about 30 to 90 seconds. When the display changes from (--) to AC, clean air calibration is complete. The channel t is now being calibrated at clean air.
4. Place the cup from the portable purge calibrator over the sensor.
5. When the channel displays AC, apply gas to the sensor. Watch the display change from AC to CP as the sensor detects gas. If the display does not change from AC to CP after six minutes, the channel returns to normal operation.
6. Wait for the display to change from CP to CC when the calibration routine is complete. If the display indicates F2 (failure to calibrate), remove the gas, close the valve, and take the calibration cap off the sensor. Recalibrate the channel after 5 minutes.
7. Remove the gas by closing the valve on the cylinder and taking the calibration cap off the sensor. Watch the display return to normal operation, when the gas concentration drops below 5% LEL.
NOTE: Low and High alarms are disabled during Calibration mode.
3.7 Aborting Calibration
Calibration can be aborted before the calibration gas has been applied.
To abort calibration:
1. Wait until AC displays. Calibration cannot be aborted when (--) is flashing.
2. Press the Mode button and hold it for approximately 5 seconds. Release the button when the calibration level displays.
3. The channel returns to normal operation.
3.8 Setup and Setup Check Modes
The Setup Check mode allows the operator to view the selected options for the module without allowing any changes to be made. Once this mode has been entered, the module automatically displays each of the selected options for a short period of time and then it returns to normal operation. The Setup mode allows the operator to change the operating parameters by making choices for selected options.
The Setup Check & Setup modes display identical information with the following exceptions:
• The Setup Check mode allows the user to view the operating parameters of the channel, whereas the Setup mode allows the user to change these parameters.
• Entering the optional password is only available in the Setup mode.
NOTE: The Setup and Setup Check modes cannot be entered if the unit is in alarm .......................
Thanks for your reply
GM 480A not the same model in 4801 no digital display it will match GM610A anyway thanks for yr effort.
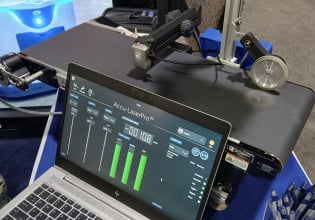
I have an image of the module i will try to post
Thnaks
Thanks for your reply
GM 480A not the same model in 4801 no digital display it will match GM610A anyway thanks for yr effort.
I have an image of the module i will try to post
Thnaks
Hi Kannanvel,
Thanks for your reply and feedback.!
OK as per the shared file.. GM4801 is little bit old fashion way...
Span zero would be for calibration...
Do you have an idea about C/N selector..
I will have a look on web and ask around my professional network if anybody have such manual..
Thanks for your reply...
Hi
Controls Guy25
Your rite its old modelnits installed on the 6B machine
C /N. For calibration and normal mode selection as i know the put the calibration mode sw to C and inject the gas and adjust the span as per reference gas
. During power up sometimes control module will fail also don't know how to change the alarm setting. Just want confirm.for power up and power off is there any special concern like Bead current adjust or something .
Thanks once again .
 Facebook
 Google
 GitHub
 Linkedin