Facebook
 Google
 GitHub
 Linkedin
Merry ControlByWeb-mas! A Fun Holiday Light Show Project
As an engineer, why would you settle for simply plugging and unplugging your Christmas lights when you could, instead, spend many hours automating this very important December job? Let me show you.
As control engineers, it’s our duty to over-complicate even the most simple of tasks. If it can be automated, it must be automated. Someone should embroider that motto on a throw pillow. I’d buy one.
Today, we’re going to investigate one of the most important jobs that we can undertake in December: the task of turning the Christmas lights on and off.
There are many tutorials where lights are set to music tempos or chasing RGB color schemes, but we’re going to opt for a somewhat less complicated method of control. In short, I want to choose exactly when each string of lights turns on and off, and I also wish to be alerted when certain strings change status.
Oh, and I want to be able to configure the entire display wirelessly.
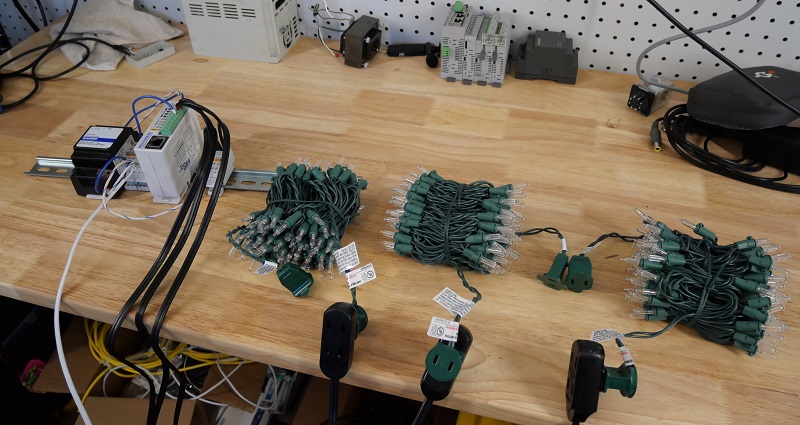
Figure 1. The ControlByWeb relay with three strings of lights attached to the relay outputs.
Christmas Light Hardware: ControlByWeb
For this task, I turned to a web relay designed by the ControlByWeb company out of Utah. I have used their products in the past for simple experiments (see the intro tutorial here), so I know that this application is a perfect fit for such a product. I do not wish to go to the length of designing my own custom microcontroller solution, and I do not have time to do so. However, the 4x relay outputs, WiFi access, and the web server configuration of the ControlByWeb X-410W web relay are exactly what I need.
For this project, I only needed three strands of lights, so I purchased three short extension cords, cut off the plug end, and then stripped the wires. The web relay uses a common connection to supply all the relay terminals, so this terminal is supplied with 120 V AC. The extension cord leads all return to neutral.
The relay connections allow me to independently control the lights, either by schedule or by external input.
Program Logic
The web relay is programmed via a web server, and although it’s not a PLC that uses ladder logic, it does include many options for control logic using timing or digital input conditions.
My relay has already been configured with WiFi access (see my previous tutorial for instructions about this process). Currently, after some other projects, the WiFi IP address is 192.168.1.36.
We log into the web server with the IP address followed by /setup.html, so: 192.168.1.36/setup.html
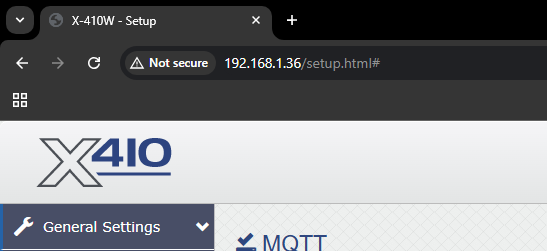
Figure 2. Logging into the web relay server via the IP address.
I need to set up two parts: the schedule for the light strings and the email alert for notifications.
Syncing the Real-Time Clock
Before scheduling tasks, we can set the clock manually or by syncing it with network access. I will allow it to sync daily, although that might be more frequent than is really necessary. In the General Settings -> Date/Time, we can set the sync server and the UTC offset, -8 hours for the Pacific time zone.
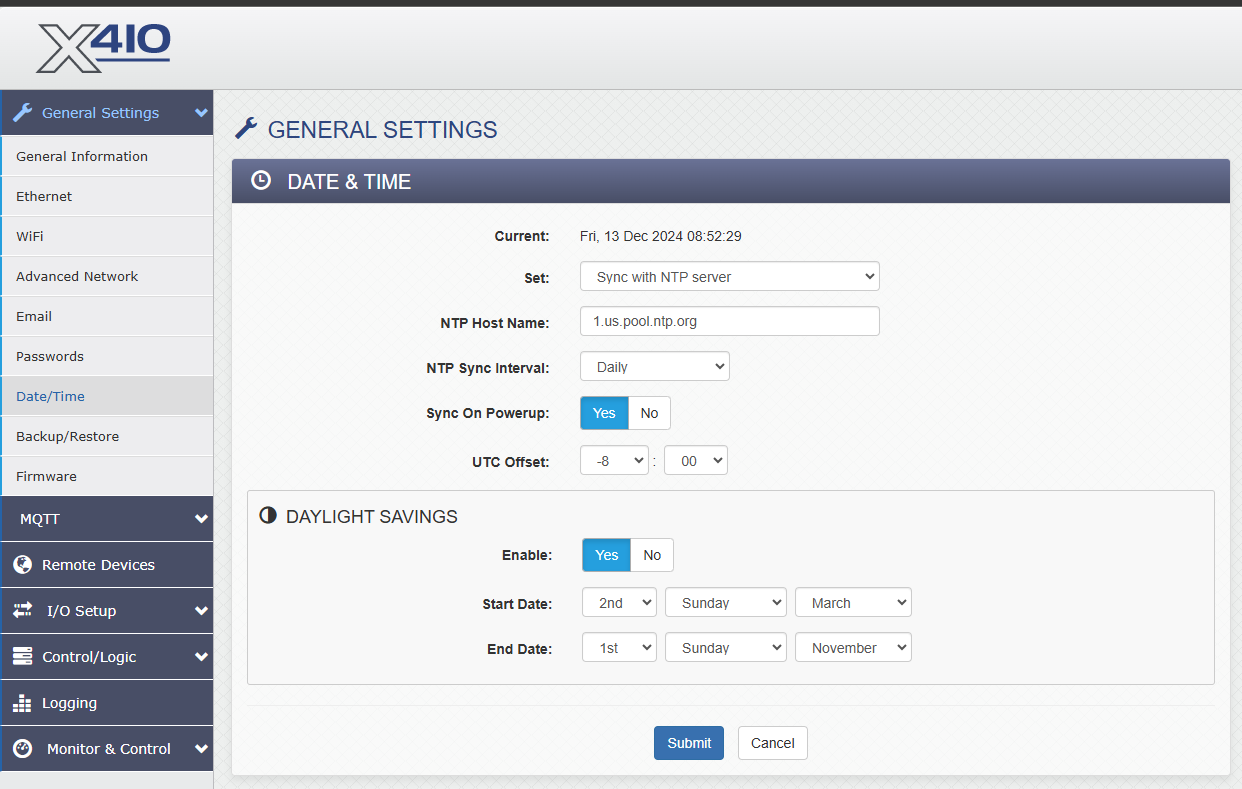
Figure 3. Setting the date and time settings automatically.
Web Relay Schedule Tasks
Next, we need to turn on the relay outputs at a specific time. I will choose to turn on all three strings of lights at 5 pm, just when it’s getting dark. Another option is sunset and sunrise, but I’ll keep mine on a set time schedule since the lights will only be active for a few weeks.
To activate a scheduled task, we must first set the start day and time. The ‘time’ in this case is the exact moment that the lights should turn on. My three actions are to energize the three relays. Finally, set the repeat to ‘daily.’
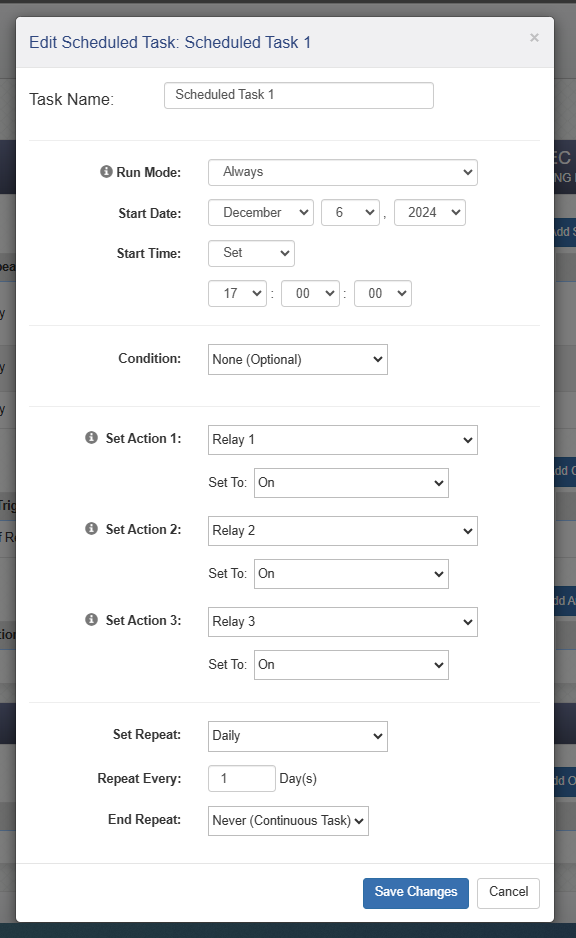
Figure 4. Turning on all 3x relays at 5:00 pm (17:00)
I also need to turn the relays off at a specific time. Light strings #1 and #2 are inside my barn, so I’ll leave them on until the early morning hours. Light string #3 is outside the door, so I’ll turn it off at 11 pm.
Setting two more tasks the same way as above, except the times will change, and the action is now relay = Off instead of On.
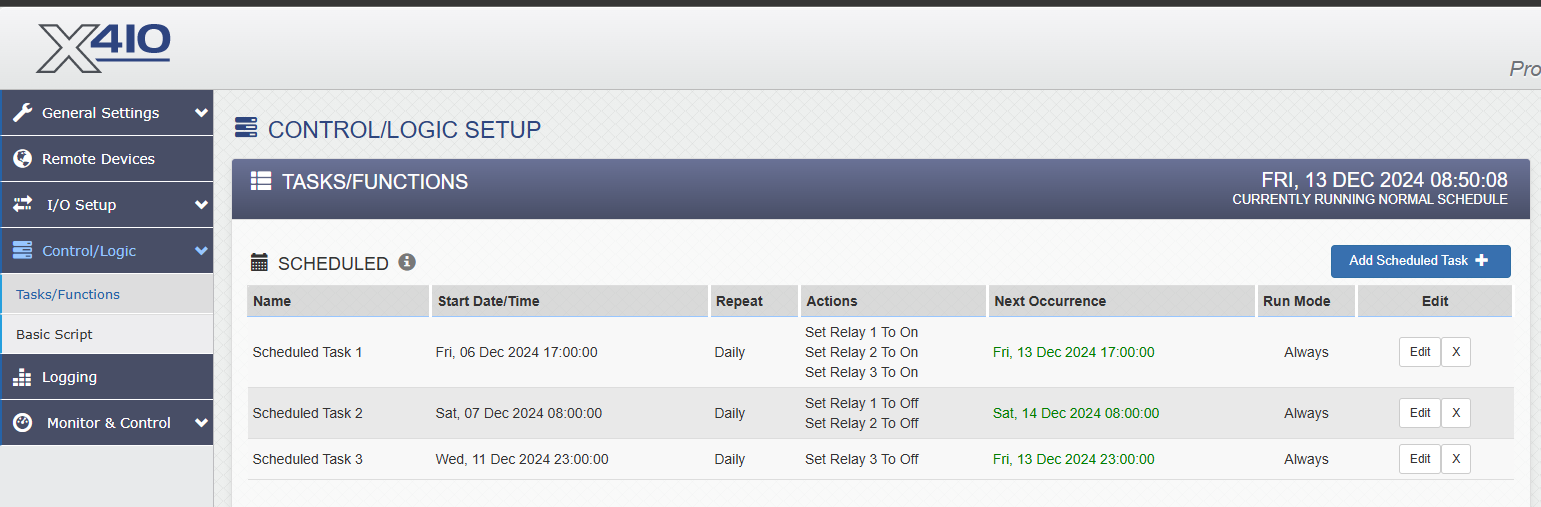
Figure 5. The finished schedule for turning the lights on and off.
Email Alerts
The last step in this automation project is an alert that informs me when a task is completed. Although optional, this step provides a couple of very useful pieces of data.
When an email alert is received, it helps with debugging the project. As an example, when I first set up the task, I forgot to set the repeat frequency to ‘daily.’ I received an email alert the next morning telling me that the lights had turned off. Then, I received a similar email in the evening informing me that the lights had turned back on. Everything was going according to plan.
But then, I didn’t receive any email the following morning.
Sure enough, I forgot to set one of the scheduled tasks to a ‘daily’ repetition, and the email (or lack of) helped me to immediately identify and solve the problem.
Another perk of notifications is particularly useful to people, like myself, who live far outside of town. With an automated email that arrives twice daily, I have the assurance that the main power is still on at my property, even if I am gone at a relative’s house for a few days, as is common during the holiday season. Coming home to a refrigerator of spoiled food isn’t the kind of Christmas surprise that I enjoy.
To set up an email notification, we simply need to enable the proper server, port, and password. If you (or your company) use Gmail as the domain, you must provide extra security and password updates. This process is already thoroughly explained by ControlByWeb in a tutorial, and the process works very well.
Once we have the credentials for this password, the settings below should work correctly. You can verify the process by sending a ‘test email’ which will provide some basic diagnostic information if it doesn’t work.
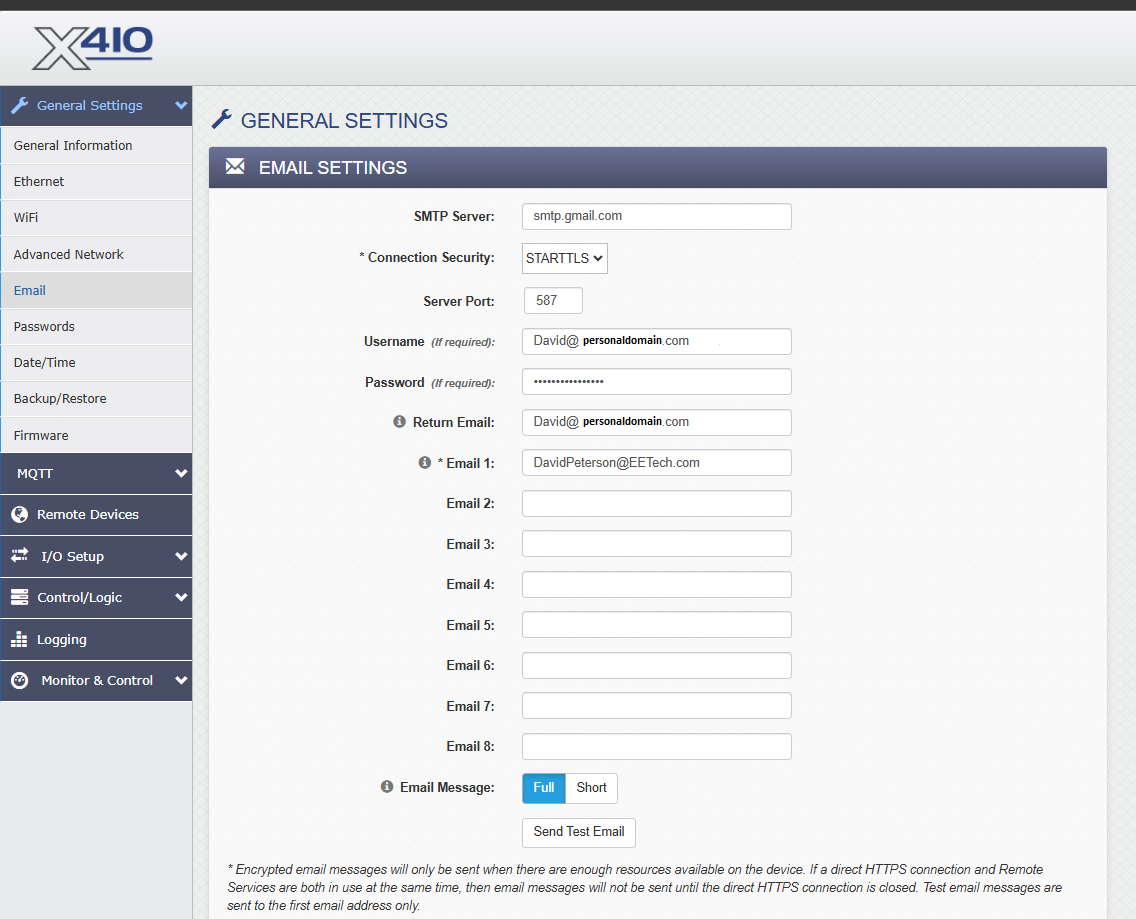
Figure 6. Setting up an email server.
Once the email address is in place, I can add a conditional task to my logic. Whenever Relay 1 changes status (once in the evening, and once again in the morning) I will receive an email notification with the status of all inputs and outputs.
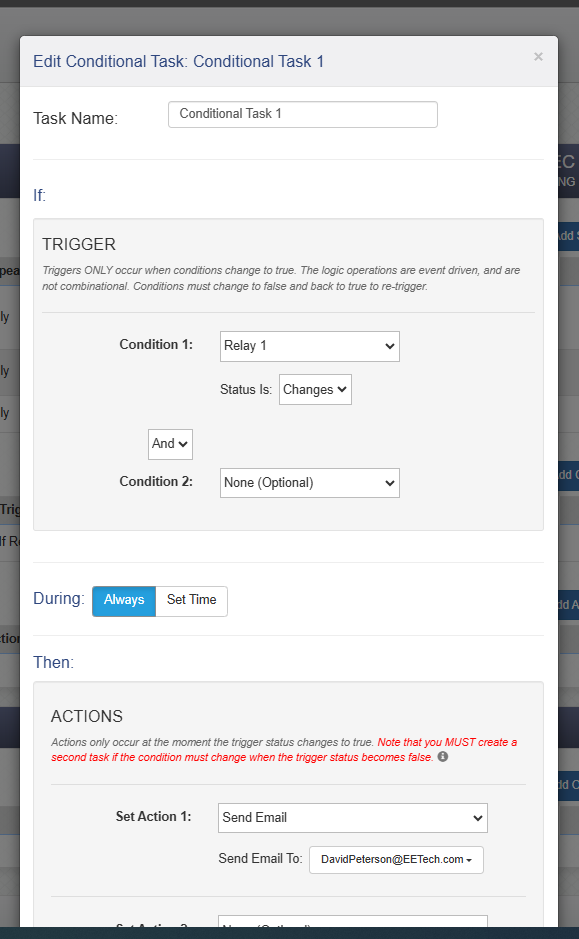
Figure 7. Setting an email alert trigger when Relay 1 changes state.
Build Your Own Holiday Projects
The holidays are a great time to hang out with your family and spend time on useless projects that would, at any other time of the year, seem silly. Not now. We have things to accomplish, and they include lights, train sets, and trees. So get to it, and if you have any links to your own awesome projects, drop them in the comments, and I might just add them to my own project list for next year.
May The Good Lord bless you all as we round out this wonderful 2024 and look forward to a great new year.