Facebook
 Google
 GitHub
 Linkedin
Creating and Running a Robot Program for a Meca500
This tutorial explains how the Meca500 executes stored motion programs triggered by a PLC.
The Meca500 robot arm departs from traditional controller-based robots by relying on external devices for logic and I/O control. In this tutorial, we walk through how to write structured, function-based motion programs directly on the robot using MecaPortal, save them for later use, and execute them on demand from a PLC. This approach is well-suited for applications with consistent, repeatable motion and highlights the flexibility of the Meca500’s programming and control architecture.
In previous articles, we’ve discussed the setup of a Meca500 robot arm and how these robots can be directly driven by sending target points from a PLC over Ethernet.
In this article, structured text and function-based programs will be written and saved directly on the robot, and a signal from the PLC will run them.
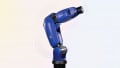
Figure 1. Mecademic’s Meca500 6-axis robot arm.
How Is This Different From Normal Robots?
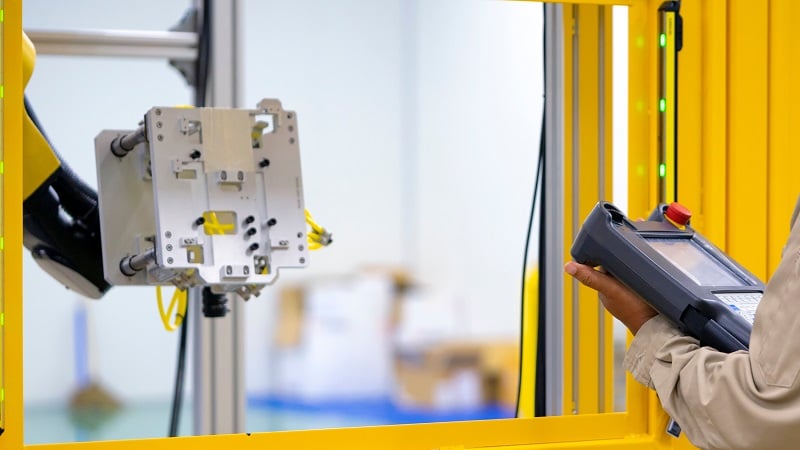
A standard industrial robot also has multiple programs written and saved to its own memory. These programs can be called and run from a teach pendant or from the controller. A program is activated after power-on; then the robot moves, pauses to wait for input signals, activates output signals, and performs all its own math functions to offset and calculate new positions as the program loops.
In the Meca500, control works differently. The robot isn't handling any I/O data; it’s not paused waiting for a specific input signal before advancing through the program, and it doesn’t calculate new positions. All I/O logic is handled on the external PLC, then at the proper time, the robot is commanded to execute one of its motion programs.
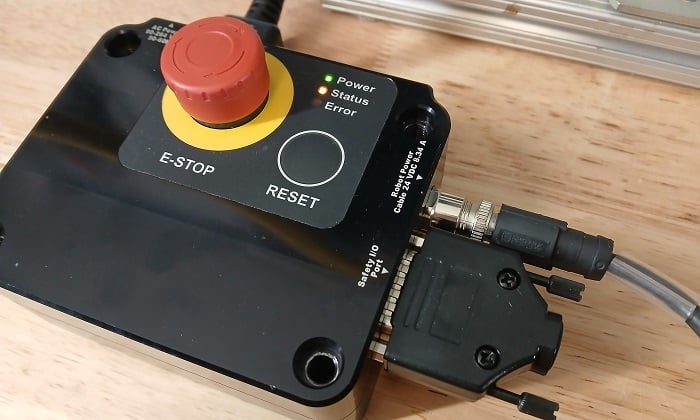
Figure 2. The robot I/O block - only for safety I/O.
What, then, should happen if there is a need for positional calculations or a delay while waiting for an input signal? The answer is that two methods are provided for commanding the robot.
If the Program Includes On-The-Fly Changes
If the program does require sensor inputs, modifications to points (perhaps based on a z-axis increment), or calculations based on external conditions, then the points can be determined by the PLC and sent directly to the robot; no programs need to be written or saved on the robot. This method was covered previously, but it also includes many other programming methods, such as Python and C++.
If the Program Includes Only Consistent Motion
If the robot repeats the same simple, cyclic motion each time the program is executed, we can write and save the program in MecaPortal and run it from the PLC. You can save a few programs, so even if there are multiple motion programs, it’s a simple approach.
This entire process involves two main steps. First, create the program, and then activate it.
Writing and Saving a Program
For this first step, we will turn back to MecaPortal. Power the robot on and connect it to a PC via an Ethernet cable. Since a PLC will be involved, the most logical setup is a network switch that links the robot, PLC, and PC.
Open a web browser and navigate to 192.169.0.100 (unless the IP address has been modified).
In the main programming window, we will design the motion program. We do not have the capacity to cover all available commands, so we will design a simple program that steps through numerous movements and velocity configurations.

Figure 3. The code editor interface in MecaPortal.
Setting up Velocities
Begin the program by establishing the velocities of the three main types of motion:
- SetCartLinVel(mm/s, range from 0.001 to 5,000): this, along with the next entry, sets the TCP's target speed for linear moves (MoveLin).
- SetCartAngVel(deg/s, range from 0.001 to 5,000): sets the target rotation speed of the TCP. Both of the previous two entries work together in linear moves (MoveLin) to ensure that the motion stays within but never exceeds either of these values.
- SetJointVel(%, range from 0.001 to 100): this sets the target speed of the fastest joint during a joint or positional move (MoveJoints or MovePose).
Choose conservative values for each command.
SetCartLinVel(100)
SetCartAngVel(45)
SetJointVel(25)
Determining TCP Positions
We must be certain of the target positions before writing motion commands. For beginners, use the jogging interface to move the robot very close to the target. Jogging will provide the assurance that you have correctly evaluated the directions of the x, y, and z axes. Guessing on a Cartesian point and omitting a (-) sign in a coordinate can be disastrous.
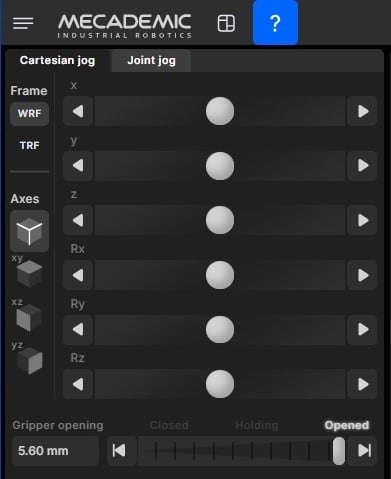
Figure 4. Jogging commands.
Once the point is known, the motion command can be inserted. Most often, this is a MoveJoints or MovePose, since those will move to the point with the greatest speed. They won’t always follow a perfectly straight line, so don't use them when carefully gripping an object with little room for error.
The main difference between MoveJoints and MovePose is the information about the target.
- The Joints command requires you to know the angle of each of the 6 joints, and so the position of the TCP will be the result of all of those joints.
- The Pose command requires you to enter the x, y, and z coordinates, along with the angle of rotation around x, y, and z. The controller will calculate the required angle of each joint.
For our program, the robot will approach a pick point, reach down to grip an object, and then place it in a nearby location. The sequence, in plain English, looks like this:
- Quickly move above the pick point
- Carefully reach down
- Grab the object
- Carefully lift straight up
- Quickly move to a position about the set-down point
- Carefully reach down
- Release the object
- Carefully move straight up
- Quickly move to a neutral position that doesn’t waste time when the program begins again
The use of carefully denotes that we will use MoveLin, and quickly indicates that we may use MovePose or MoveJoints. I’ll use MovePose so that all points are in x,y,z,ɑ,β,γ format.
The only other command to explain is the gripper motion. We might use GripperOpen and GripperClose, which behave exactly as their names suggest. GripperMove is an alternative that gives us more control over the gripper position in mm. For this simple program, we’ll use GripperClose and GripperOpen.
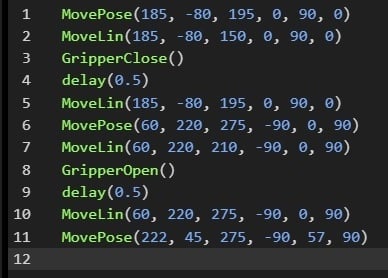
Figure 5. Complete program.
//1) Grip position near the front of the robot
MovePose(185, -80, 195, 0, 90, 0)
//2)
MoveLin(185, -80, 150, 0, 90, 0)
//3) The delay allows the robot to remain in place until the gripper is securely closed.
GripperClose()
Delay(0.5)
//4)
MoveLin(185, -80, 195, 0, 90, 0)
//5) Release position near the left side of the robot
MovePose(60, 220, 275, -90, 0, 90)
//6)
MoveLin(60, 220, 210, -90, 0, 90)
//7) Remember the delay, or the robot will begin leaving before the gripper is open
GripperOpen()
Delay(0.5)
//8)
MoveLin(60, 220, 275, -90, 0, 90)
//9) Somewhat random intermediate position
MovePose(222, 45, 275, -90, 57, 90)
Save the Program
This step is quite simple. At the bottom of the Code Editor is the Save icon. Give the program a numeric name (integer number) to run it from the AOI on the PLC. The data type for that command is a REAL, and the program name cannot contain (.), so it must be an integer.
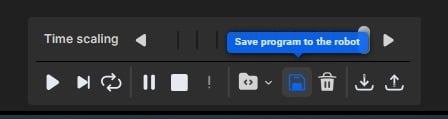
Figure 6. Saving the program to the robot.
Run the Program From the PLC
The PLC program that calls programs needs only two function blocks from the AOI list. First, a Connect FB allows the PLC to take control of the robot, since it had to be jogged from MecaPortal. In this command, place a ‘1’ into the Connect field of the FB.
To run the program, use a Meca500StartOfflineProgram command FB. The Parameter Value field requires a REAL type tag. This tag can be set to a constant value (the program number saved in the robot), or it can be changed to select among multiple tags.
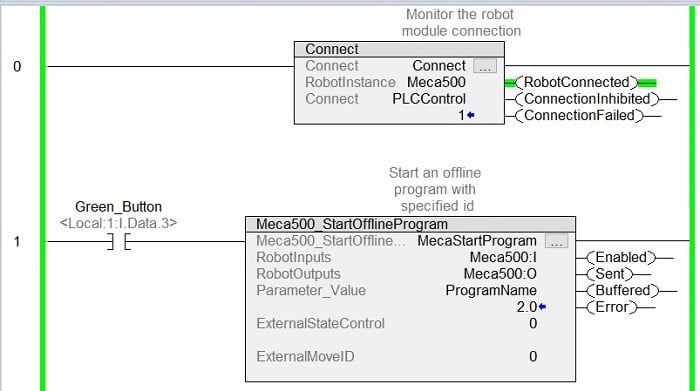
Figure 7. Connecting to the robot and activating a program.
Note on order of operations: If you assign a Parameter Value number and activate the rung, the robot will queue up that move. If it is ready to move and the PLC is in command, it will move immediately. However, if the PLC is not in command, the move is still queued, so the robot will begin the move immediately when the Connect field of the FB is set to ‘1’.
Many Options for Robot Motion
One of the interesting things about this robot is the variety of methods for motion input. This is the second tutorial that describes a way to move the robot, and there are more. This breaks away from traditional programming and gives the robot much more flexibility across applications.