Facebook
 Google
 GitHub
 Linkedin
Intro to CODESYS: First Project Using CMZ Hardware
CODESYS is an automation software that is independent from any one vendor, capable of many PLC, I/O, and motion operations. However, being vendor-agnostic can present challenges. Learn how to get started.
Many automation manufacturers are embracing a more ‘open’ concept, where the hardware is still reliable and user-friendly, but a greater emphasis is placed on allowing the system to integrate a wide variety of components. Sometimes these components are not all sourced from the same vendor, and historically, that has presented compatibility issues. To solve this challenge, there must be a way to connect all of these devices with a unified structure, both physically and virtually.
CODESYS is a popular programming platform that incorporates the control, the I/O, and the motion all into a single software suite, and it’s being adopted by a large number of manufacturers.

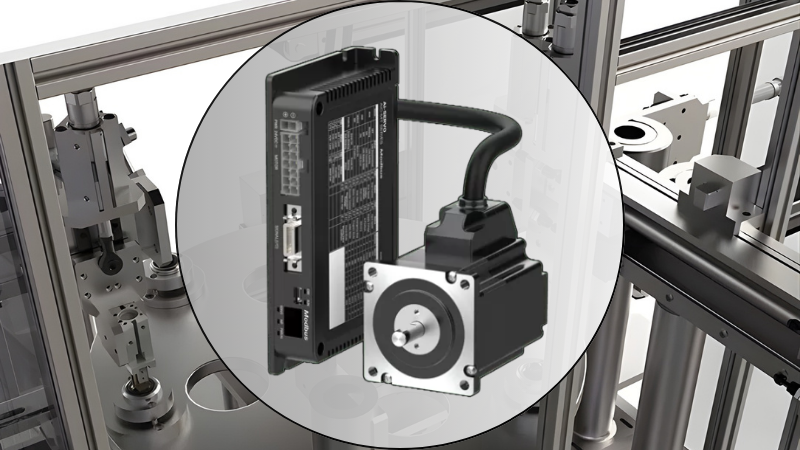
Figure 1. A simple CODESYS program will be installed on the CMZ FCT640 controller.
Recently, thanks to the generosity of some loaned equipment from Bright IA, an automation integration company in Texas, I was able to work with CODESYS using hardware from CMZ Sistemi Elettronici. The hardware includes both a controller and motion system, but to begin, we will build and download a simple PLC program with the CODESYS platform.
How is CODESYS Different?
When you use software from a specific vendor, it’s created for programming their own devices and so it tends to have a pre-set list of compatible devices, POUs (programming structures), commands, and diagnostic tools. This makes the initial setup painless and quick, but down the road, it can present a roadblock if another vendor’s device must be integrated into the network.
There are already a few solutions to this problem, such as manuals with listed parameters for Ethernet (or other fieldbus) messaging packets, electronic data sheet (EDS) files, or standardized protocols like IO-Link. But in contrast, the idea of CODESYS is inherent openness to compatibility with any system that has the ability to run the platform.
This open architecture has obvious benefits in terms of flexibility, but that usually means that the user needs to consider a few more steps during the initial configuration.
Device Descriptions for CODESYS
Each brand that provides CODESYS compatibility must be able to provide a ‘device description’ which is a file that identifies the key specs and parameters that CODESYS uses to aid in the creation of the project and the hardware tree.

Figure 2. The Device Repository window.
Without this file, it’s sort of like trying to use your computer without a mouse or touchpad. Yeah, you could use commands for every single operation, but only if you really know what to do, and if you have a lot of patience. Most manufacturers simplify this process.
To find the right device descriptions for a CODESYS controller, simply search “xyz brand CODESYS device description’ on the internet and follow the links. I’ll explain the process for CMZ hardware later.
CODESYS Library Repository
Equally important to the device description is the software library that contains the appropriate program organizational units (POUs) and commands for the hardware. Most simple ones are standardized across all brands, like normal contacts, coils, timers, and counters. But for particular applications like vision, motion, and feedback algorithms, it’s necessary to find the custom commands.
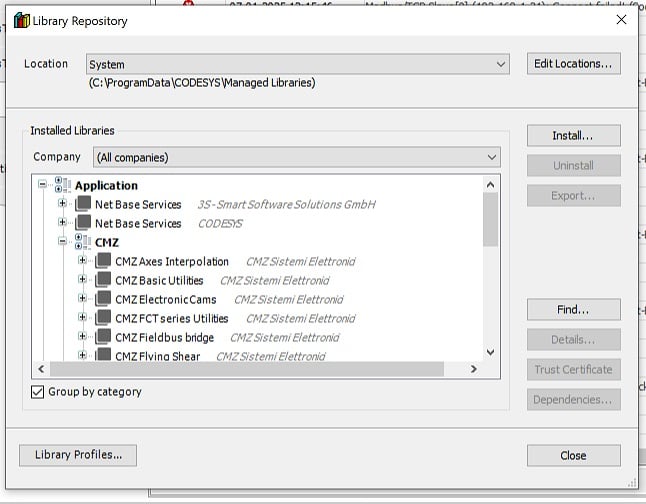
Figure 3. The Library Repository window.
Like the devices, the library files can be found on the manufacturer’s sites. Both of these can also be found within the CODESYS tools, as long as the server locations have been supplied to the CODESYS repositories.
First Step: Configure Your Connection
Before you can connect to any controller, you’ll need to set the IP address to the same subnet as your programming PC. For the CMZ equipment that I am using, this is done with the FCTTools software.

Figure 4. The FCTTools software for configuring CMZ controller ports.
Note: I did have to set my PC to a static IP address before it would connect to the controller, even though they were on the same subnet previously.
Installing CODESYS and Repository Entries
Installing CODESYS is fairly easy. You will need to create an account with the CODESYS store.
North America: https://us.store.codesys.com/ and download the appropriate V3 bit version (current as of pub date).
Global: https://store.codesys.com/en/ and again, download V3.
Install the software just like any normal application.
The library and device files are contained in the download for the controller in the CMZ customer portal. Depending on your application, you may find these easily accessible on the manufacturer’s site.

Figure 5. Locating the CMZ library package from the CMZ site.
You will need to extract these two folders and run the files with the .package file extension, one for the software libraries and one for the device descriptions. For specific instructions, my advice is to carefully follow Step 6 and Step 7 in the FCT User Guide which is available on the CMZ user login page (you will need to request access by creating an account).
Creating and Downloading the CODESYS Project
For this intro article, we’ll only be downloading a simple program. Later on, we will move on to more advanced applications.
Open CODESYS and create a new standard project.
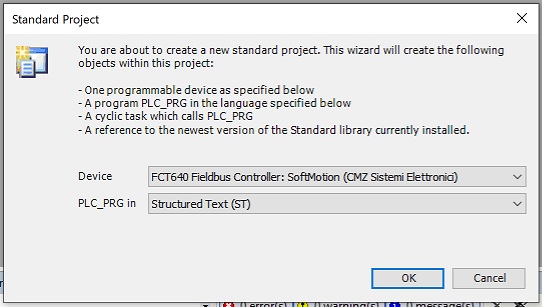
Figure 6. Creating a new standard PLC project in CODESYS.
Select the proper device. In my case, this is a CMZ FCT640 with the SoftMotion license.
Since we haven’t connected any physical I/O devices, we’ll create a counter that runs automatically, incrementing continually while the PLC is in RUN mode.
Open the PLC_PRG, which is the structured text programming environment.
The environment already has a placeholder for variables, so within this section, insert the following:
VAR
counter: DINT;
END_VAR
Then, down in the programming space, we make a simple incrementing code:
counter := counter + 1;
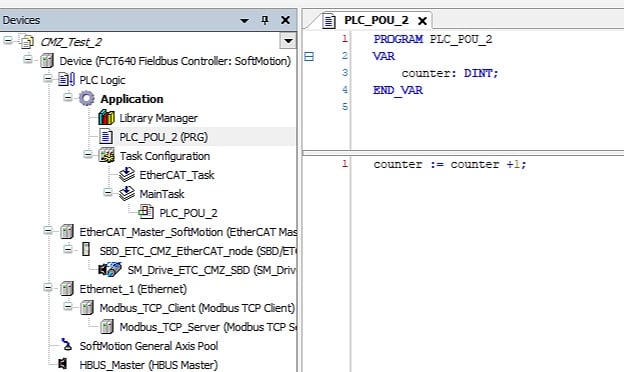
Figure 7. Creating the variables and the code for a simple CODESYS counter program.
The only remaining step is to identify the controller that requires the download.
Previously, when we configured the IP connection, we already confirmed that the PC and PLC could communicate. So we double-click on the ‘Device’ listed in the left side project tree, and navigate to the Scan Network tab.
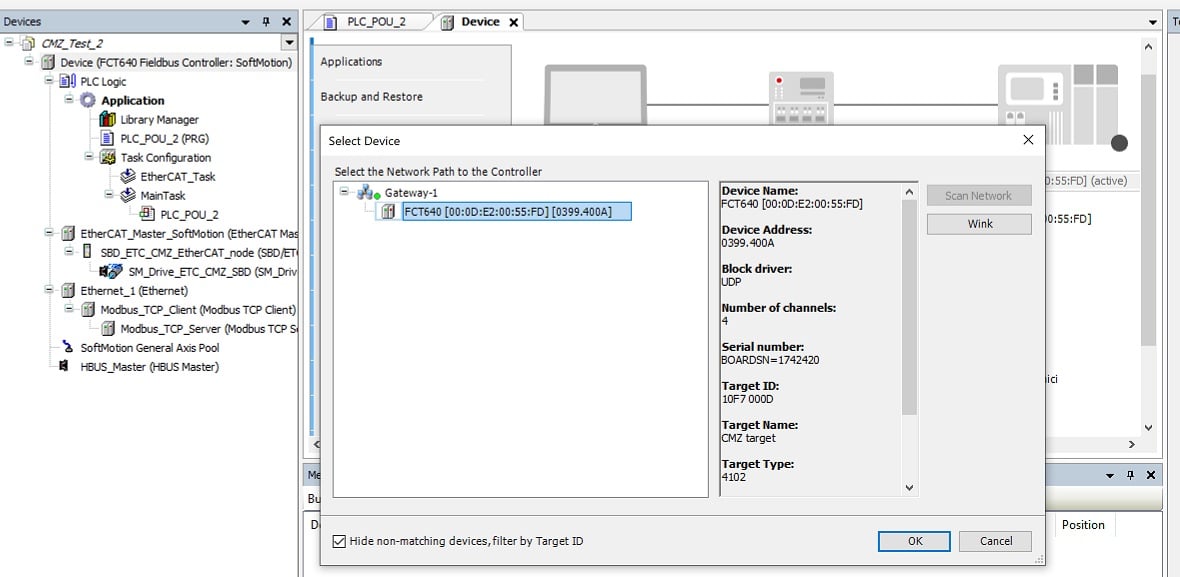
Figure 8. Using the Network Scan tool to detect the proper controller path.
Our FCT 640 device should be found on the network.
Once the communication path is confirmed, you can finally log in (which downloads the current program) and then Run the PLC.
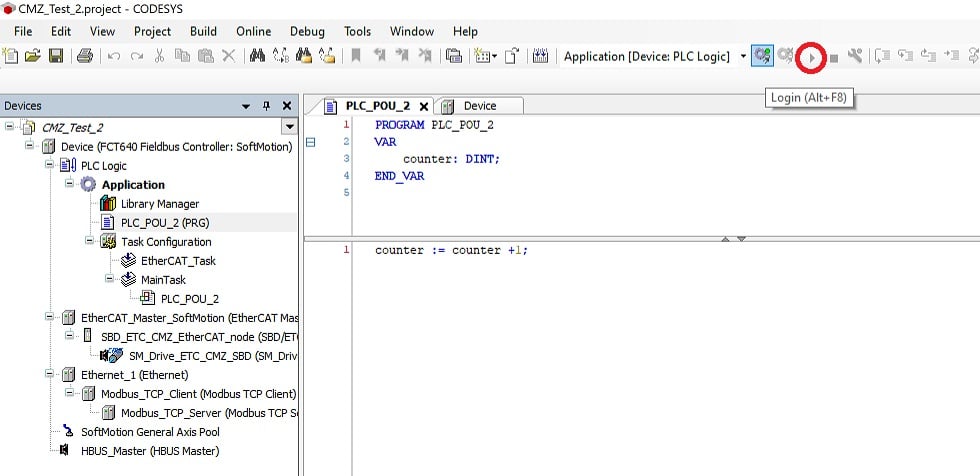
Figure 9. The Login button for downloading the program (highlighted) and the Run button to set the CPU mode (circled in red).
Troubleshooting: Missing Libraries
When first compiling a program, it is common to be missing some libraries related to any external hardware you may have added to the project. For some devices, I/O adapters are added by default, and some references to data types are missing. How do you know? When you try to build the project and receive multiple errors (mine had 73 errors at first, don’t worry!). Double-click on the errors to see if they open a window of missing libraries, and they can be installed from CODESYS directly.
Implementing CODESYS for Future Projects
After a quick introduction to CODESYS, it’s hard to determine exactly which projects will be better suited for this software, which, while very capable, has a larger learning curve. Stay tuned for future topics about I/O connections and motion for a CODESYS system using this CMZ controller and motor equipment.
All images used courtesy of the author