Facebook
 Google
 GitHub
 Linkedin
Epson Robot Programming Example
Epson robot programming bears similarities to other industry-standard brands, but contains many unique features, including the ability to run background programs alongside the main function.
This article is the conclusion of a 6-part robotic series. Check out the other articles in the series.
- Introduction to ABB Robot Programming
- ABB Robot Programming Example
- Introduction to FANUC Robot Programming
- FANUC Robot Programming Example
- Introduction to Epson Robot Programming

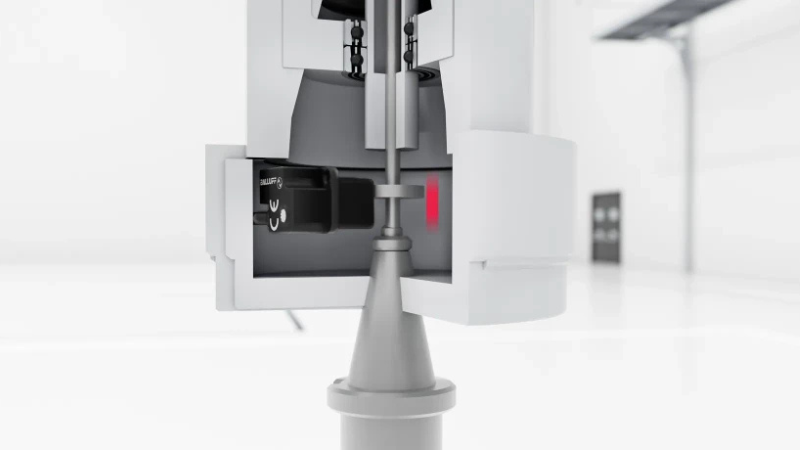
Figure 1. Epson is well-known for a variety of SCARA models and applications. Image used courtesy of Epson
Industrial Applications
The robot division at Epson is well known for its SCARA robots. SCARA robots are great at moving small components quickly from point A to point B. This makes the Epson SCARA an attractive robot for the electronics assembly industry or the pharmaceutic industry. A typical application would be picking components from a bowl feeder inline nest and placing the item into a partial assembly located on a conveyor or servo track pallet.
Let’s take a look at how to set up an initial example and the main parts of the code that are needed for this type of robot.
Main Program
Much like other robot programming languages, we start with the main program. The Epson robot must have a program called main which will be used for housing calls to other functions or in small cases, it may contain all of the robot motions in the scope of the main program.
In the SPEL+ language, the Main program is referenced (Function) and ended (Fend) with the following structure:
Function main
‘Code to be executed’
Fend
The main function can also be called from one of the background programs using the command ‘StartMain.’

Figure 2. Robot arms being used for assembly and packaging. Image courtesy of Unsplash
Initialize Function
Within the main program, it is good practice to call an initial function that will clear out any tracking data or handshakes between the PLC and the robot or internal handshakes. The initialize function should be called before any repeated loop at the top of the program. This way, if the power is reset or the program is restarted from the beginning, we clear any temporary data that may lead to unpredictable motions.
Loops and If Statements
In order to return to a previous point in a repetitive program once completed, we use a loop that may look for product parameters or job numbers that are received from a PLC. In the SPEL+ language, the syntax is a Do-Loop structure. It can either be an infinite loop, or a While statement is included to look for certain conditions from the PLC or from discrete inputs.
Function main
Do While Switch(1) = 0
‘Code to be executed’
Loop
Fend
To make individual program flow choices based on conditions, the SPEL+ language can make use of If, Then, EndIf statements which examine one variable for a single comparison statement, or Select, Case, Send which examine a single variable and find a match from a list of options.
If, Then, EndIf is common for examining discrete or PLC inputs. The Select, Case, Send is useful when many motion options exist for a variety of commands.
Function main
Select RobotCmd
Case 1
Call mPickPart
Case 2
Call mPlacePart
Send
Fend
Variables
With the SPEL+ language, variables are defined in different places throughout the code, and their location defines the ‘scope’, or what section of the code can access them.
Local - These variables are known as local variables and are only used within the function they have been declared.
Module - These variables are declared at the beginning of the program or module, and are available to all functions that are declared within that program.
Global - Global variables are declared in another program and can be accessed by any function in any program. We must use the keyword “global” before defining the datatype when declaring a global variable.
Using #define allows a programmer to create variables to associate numbers with a label.
#define PickPart 1
#define PlacePart 2
Function main
Select RobotCmd
Case PickPart
Call mPickPart
Case PlacePart
Call mPlacePart
Send
Fend
In the above example, if “RobotCmd” has a value of 1 then the “mPickPart” will be called. The “mPlacePart” will be called if “RobotCmd” has a value of 2.
#include can define information such as variables inside a separate file, then include that definition file inside our main program later:
In a separate file, called defs.inc:
#define PickPart 1
#define PlacePart 2
Then for the main program:
#include "defs.inc"
Function main
Select RobotCmd
Case PickPart
Call mPickPart
Case PlacePart
Call mPlacePart
Send
Fend
This feature makes the code easier to read but can cause some confusion since they are separate files, so make sure to document the “include” file well.
Robot Positions and Motion
Positions are stored as encoder degrees for each joint, with labels such as P1, P2, etc. It is good practice to predefine the positions of the robot that you will frequently use in your operation before writing the code. If this is done, you can then organize and group positions within that table to facilitate easy reading.
The robot points on a SCARA may include a “hand” parameter, defined as lefty or righty. The hand parameter tells the robot which orientation the robot arm should be in for a specific taught position. If the hand parameter is not defined, the move to the position may cause collisions, and it may have a different orientation in two successive moves to the position.
Continuing the previous example, the mPickPart called function may include motion:
Function mPickPart
Move P2 ‘Approach position
Move P1 ‘Pick position
On 1 ‘Activate gripper
Move P2 ‘Approach position
Fend
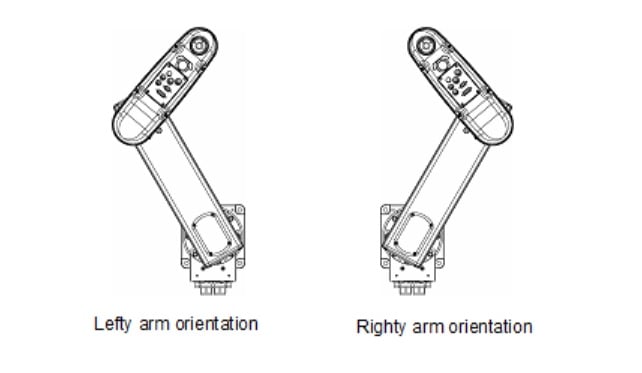
Figure 3. Arm orientation from the top view of a SCARA robot.
Using Offsets
For proper motion programming, it is best to teach one final pick or place position then use offsets to travel to locations near that one final location, such as packing items in a row. With SPEL+ we wrap all these moves and offsets into one command.
Pass pApproach :Z(zOffset), pDest :Z(zOffset)
The above command will move the robot close to but not through the pApproach position with an offset value of zOffset to the pDest position with the same offset value. By using this shorthand command we can save a few lines of code. The idea behind using offsets is to reduce the number of taught points. Teaching points takes time and if the position is not named correctly it can be difficult to know where the robot might end up.
Background Programs
With Epson, each program runs independently from the other so we can easily create background programs. A background program is a section of code that runs asynchronously to the main program where all the motion commands might be issued. Typical use cases of background programs may be to set outputs when the robot enters zones or defined areas, or to monitor safety inputs to guide the robot to a safe location.
Error Handling
During program execution, it is important to monitor for errors and handle them appropriately. If conditions are not met, we need to set error flags. With the SPEL+ language, we can set error handling tasks using the OnErr keyword. An error handler is an interrupt, similar to other programming languages. When an error occurs and the function is using the OnErr keyword, the internal error handler will immediately execute the specified function.

Figure 4. Programmer on a computer. Image courtesy of Unsplash
Summary
The functions explored in this article are only short examples of programming an Epson SCARA robot, at the end of the day it's up to the programmer to determine how the code should be laid out. There are many other functions besides those listed in this article, and this is only a brief description of some common commands available in the SPEL+ language.