Facebook
 Google
 GitHub
 Linkedin
Gateway Configuration of RTU560 to Communicate Power System Data Over IEC-101 and IEC-104 Protocols
All real-time power system data can be communicated to a central control system to protect main equipment from overloading. Learn how to create a project directory structure, hardware configuration, and set network tree parameters for real-time control and monitoring.
Power generation plants are usually equipped with alternators, excitation systems, transformers, circuit breakers, isolators, main busbar, relays, switchgear, and numerous auxiliary systems. When managing large or small-scale industrial operations, a control system application in the electric power generation industry can help to improve efficiency, system reliability, and reduce operational costs by providing real-time control and monitoring.
Nowadays many modern power plants are well equipped with the latest automation technology to control and supervise the major electrical components of the plant through data acquisition. The power system is operated based on the amalgam of real-time information collected from the process and static information, i.e. the power system model available in the database.

Figure 1. Pyramid describes the general architecture of control system layers.
In this tutorial, we will walk through how to create a project directory structure, hardware configuration, and setting network tree parameters using RTUtil500 version 12.2.10.0, Windows supported software for Hitachi Energy’s RTUs 500 family. The utility program is used to configure the RTU560 collector, which acts as a gateway protocol converter that transfers power system data like the current, voltage, ampere, flow, and open/close status of circuit breakers to other control centers using IEC-101 and IEC-104 protocols.
The protocol converter is a hardware or software program that translates the protocol of one device into the desired protocol for another device. In industrial control systems, the terms Front End server and Protocol Converter server are used to support multiple power industrial protocols like Modbus, RP570, ICCP, IEC101/104, Profibus, DNP3, and so on. Before jumping into the practical work, let's first learn about some basic concepts and terminologies used in the industry to handle power system data.
Data Acquisition With an RTU
A data acquisition system (DAS) is a system that collects and handles data from the process. The field signals from local and remote objects are collected through field devices connected with remote terminal units (RTUs). The collected data is further digitized using analog to digital conversion (ADC) at the RTU level and transferred to the master station supervisor control system called the SCADA/DCS System.
The RTU is a microprocessor-based collector device is usually equipped with I/O cards including digital and analog inputs, digital and analog outputs, and other cards providing communication, CPU, memory, and power options. Figure 2 describes the schematic diagram of a single indication (ON/OFF status), e.g. fault singles and double indication, particularly for a circuit breaker and isolator.

Figure 2. The single and double indications data acquisition system.
Similarly common analog signals in industrial plants are transformer current and voltage, temperatures, unit speed in rpm, oil pressure in psi, generator terminal voltages (kV), etc. The transmitters or transducers are configured to produce output signal into milliampere (mA) like 4-20 mA or 0-10 VDC, and ADC is done in the RTU.

Figure 3. The analog to digital conversion of signal in DAS
Industrial Protocols IEC101 and IEC104
The International Electrotechnical Commission (IEC) promotes cooperation and standardization in the electrical and electronics fields and collaborates closely with the International Organization for Standardization (ISO). The IEC101/104 standard applies to the telecontrol equipment with coded bit serial data transmission and controlling geographically widespread processes. The standard enables interoperability among compatible telecontrol types of equipment and supports balanced and unbalanced data transfer modes.
A brief comparison of both protocols for preliminary understanding is tabulated below:
|
IEC-104 |
IEC-101 |
|
Ethernet/IP |
RS232 |
|
Always balanced transmission mode |
Balanced or unbalanced |
|
Always point-to-point |
Point to point or multidrop |
|
Data is commonly set with time tag |
Normally data is sent without time tag |
|
Commands always contain a time tag |
Commands does not contain any time tag |
|
NTP normally used |
Time sync via IEC -101 protocol |
Application Project: Configuring RTU as an I/O Gateway
In the project exercise, we will configure RTU560 as a gateway with I/O signals to be able to communicate with the network control center system over IEC101/104 protocols.
Setup Project Directory and Project Structure
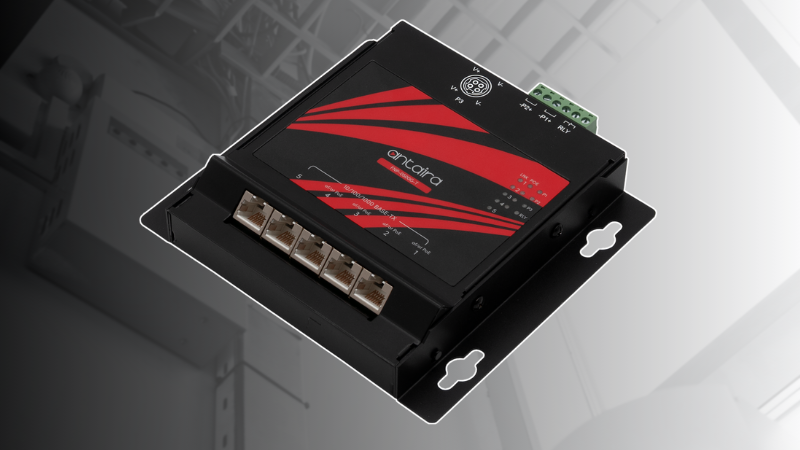
The case study is presented here on how to configure an RTU560 using RTUilt500 software installed on a separate engineering PC. The RTU560 with a 19-inch IO rack is equipped with a single power supply card, binary input card, and analog input card for I/O signals. The single 560CMR01 CPU card is equipped with 2x Ethernet and 2x serial communication ports used to communicate over IEC101/104 protocols.

Figure 4. RTU560 communicating with control centers over IEC104 and IEC101 and engineering PC with RTUtil500 software.
First, open the RTUtil560 tool icon and setup a project directory in order to make engineering more efficient, a project directory should be created as below:
-
Projects_Folder
-
Project_1 (type project_name)
-
project directory
-
build directory
-
xls_export directory
-
-
The build directory contains the file (*.rcd extension) to be downloaded to the RTU560, the project folder to save the hardware configuration file (*.rtu), and the export directory for the Excel based file for import and export of the signals. The directory paths in the wizard has been set as given in Figure 5:

Figure 5. Setting directory paths for the project, build, and export in RTUtil500 software.
Now set up the project structure by choosing the menu “File->New”. This will create the general information for the project. Enter Project name: Project_1, the station identification information, and set the max. Object ID to 32 bytes. This will reserve 32 bytes for the station name, including the signal name as given in Figure 6.

Figure 6. Project structure including station_id: Procject_1 and set max. Object_id to 32.
After clicking Next, the new wizard appears to initialize the signal tree, and here we set three station levels identification with the number of bytes allocated as in Figure 6.
-
Station 6 bytes (Level 1) - 6 bytes allocated
-
Voltage 6 bytes (Level 2) - 6 bytes allocated
-
Bay 8 bytes (Level 3) - 8 bytes allocated
This means that we have reserved 32 – (6+6+8) = 12 bytes for the names of the signals.

Figure 7. Initialize signal tree up to three levels: station, voltage, and bay.
At this stage, the project directory and project environment have been set up. In RTUtil500 software, the user interface structure offers three types of tree structures usually used for an RTU560 project.
-
Network Tree (to create RTU network and communication topology)
-
Hardware Tree (to configure internal RTU structure including I/O boards)
-
Signal Tree (to define signals with a unique object identifier)

Network Tree Structure
The network tree is used to build up the station network topology. Here we choose the lines and the communication protocols between the stations. The network tree is needed for routing the process data points through the RTU network, and the network tree gives an overview of a complete station network.
-
First, click on “Add item” and select node RTU560 station and name it. For example, the name “Baden” is provided in the snapshots given below:


-
To add an IEC101 line, according to our requirement, right click on “RTU560:Baden” and add the “Host Activity” node with type line T101 protocol type IEC 60870-5-101 and name it “IEC101_CC.”

-
Again, right click on the newly added line i.e. Line: T101:IEC101_CC, and select “Control System-Hoststaion Control System” and name it “Control System: CC1”


-
The same steps are performed for setting the second communication line for a host station by selecting protocol type IEC-60870-5-104. Finally, the network tree structure should look like as below:

Hardware Configuration
As previously discussed, the structure of the RTU hardware is displayed in the hardware tree and reflects the internal structure of an RTU. The hardware tree gives an overview of a whole RTU and enables the user to locate every data point in the station.
-
Select “RTU560: Baden'' in order to be able to configure I/O data points and connect them to the IEC101/104 NCC. Select “Demo-box,” which is a reduced version of a normal rack, and click “Add” then “Done.”

-
Now we will build the RTU hardware I/O boards. Therefore, add the RTU rack, “Add Item” and select “23ET23S” rack. Click “Add” then “Done.” The rack address will be ‘1’ by default.

-
Select Rack1, ”Add item”, then select slot 53 (one CPU takes two slots), select CPU board 560CMR01 from the list, and click “Add Item” then Done.

-
The same steps have to be performed for adding the power supply (PSU01) and the digital and analog input cards.

Configuration of Processor Board
The Ethernet interface “E1” for Line 104 has been configured to download the RTU560 database over a LAN TCP/IP connection. The IP address in this example will be 10.101.10.20 for the download and the monitoring through the webserver. When the CPU has no configuration, the jumper on the CPU will provide the default IP address 192.168.0.1.
-
Click 560CRM01 and select Ethernet interface tab E1 to enter the IP address for “10.101.10.20” Subnet mask “255.255.255.0”

-
In the last step, select “E1:Line T104: IEC104_CC”, and select Master IP address “10.101.20.81”, Subnet mask “255.255.255.0”, meaning that only NCC 104 with that address can connect. If the address is left 0.0.0.0, then any NCC104 can connect within that subnet.


Project Consistency Check
Before working with signal configuration, do a consistency check to make sure the hardware configuration has no errors. The entries in this list are linked to the nodes in the trees of the checked project. Click on a particular error and the tool will select the corresponding area where the error has been detected.
Select drop-down Menu “Project -> “Check Consistency” and double click on an error to show the corresponding window

Configure the Time Master
One CPU has to be the time master for the whole RTU560. The RTU560 can be time synchronized by selecting RTU560: Baden. Click the parameter tab, then choose “Hostline 2 IEC104_CC”.

Adding Power System Signals
In the signal tree, the structuring of the electrical process and the naming of the signals are made. The name for every data point is derived from the structure of the electrical process. In this example, we will manually build the signal list—this process is done using an Excel sheet. The signal tree will be based on the tree structure defined in the project signal tree structure as in Figure 7.

Now it’s time to link the signals with the appropriate AI board and DI boards respectively. After data points from the signal tree to the appropriate board in the hardware tree, the automatic protocol routing action is triggered by the linking of a data point. Right click on “23BE23” and “23AE23”, then “Link Item” and select each signal from the drop-down list one by one.

Data Processing and Communication
All real-time power system data can be communicated to a central control system for protecting the main equipment from overloading. The RTU560 scalable hardware platform can deliver high performance in data processing and the requirements of communication gateways with integrated serial and Ethernet communication interfaces.