Facebook
 Google
 GitHub
 Linkedin
How to Program a Robot: Industrial Robotic Arm Coding Basics
The world of manufacturing is filled with robots, but beginners are still always faced with key questions, starting with perhaps the most basic: how do you program industrial robots?
Veterans of the control system engineering industries usually fondly remember the days when devices were simpler; repair processes could be completed using the contents of a toolbag, and installation was a simple matter of connecting the wires to a local control system and energizing the machine.
But over the years of evolving technology, the learning curve for entering a control system engineering job is more difficult than ever, and will continue to become more so. For those with experience, the changes are more gradual, allowing time to learn and adapt to evolving complex automated, robotic, and cloud-based systems.
But for those entering the field as a beginner, the entry-level questions are met with confusion and overwhelmingly complicated answers. In the robotics industry, one of the most often-asked questions is simply: How do you program an industrial robot?

Figure 1. A simple yet frequently asked question: How do you program an industrial robot? Image used courtesy of KUKA
Robot Programming: How to Program a Robot
For a novice, the question does not revolve around defining a single line of code in a particular brand or identifying a certain fault code—we simply wish to explain what you would expect when first handed a teach pendant and expected to program a robot to complete a simple task.
Robot Motion: Placement, Infeed, and Destination
Before programming, take a look at where the robot is fixed in relation to two locations.
-
First, determine the place where the robot will be retrieving an object, such as a conveyor belt, storage bin, or guided chute.
-
Second, identify the location where the robot will be placing the held object. This might be a pallet, the jaws of a CNC machine, or another nearby conveyor system.
In addition to these fixed positions, be aware of any obstacles around the robot. These may be equipment frames, support posts or beams, or control cabinets for the robot itself. Later, when programming, we want to be sure to avoid these obstacles, since robot motion can be difficult to predict at high speeds.
Teach Pendant Programming in Coordinate Systems
The next step in programming the robot is to move the end tool to that point where the product will arrive into the robot’s workspace. All teach pendants, regardless of manufacturer, contain a few common features. First, there will always be a safety switch, and usually a second switch, that must be pressed lightly to allow robot motion any time a human operator may be close by. This is called the ‘deadman switch’ for obvious reasons.
The robot can be moved in a couple of different ways. At this teaching stage, it doesn’t matter how you move the robot, just get it from one point to another as quickly as possible. Later, the text in the program will determine how it actually moves in real-world operation.
These motion paths are always taught in a coordinate system, or sometimes called a ‘frame,’ to give us a way to perceive how the robot will move when each button is pressed.

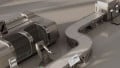
Figure 2. Control cabinet with a teach pendant that can be used to move a robot in order teach motion paths in a coordinate system. Image used courtesy of FANUC
Joint Coordinate System
All industrial arms consist of between 4 and 7 individual joints, sometimes more. To move the robot from one side all the way to the other, it may be faster to simply swing the base joint all the way around if precise. Exact movement isn’t required yet.
On the teach pendant, you are likely to see these buttons listed as J1 - J4 (or more) with a (+) and (-) on each one. These should be used slowly at first, so you can begin to understand the joints and the direction of motion.
Cartesian Coordinate System
Moving the robot in a straight line is critical once you are very close to the pick-up or drop-off point. To make this kind of motion, the robot understands a linear (or cartesian) coordinate system, where the 3D space is shaped like a box. X, Y, and Z each point in a distinct direction, just like a graph from an algebra class. As the robot is performing movement calculations in operation, it can move in all 3 axes simultaneously, so while we might jog the robot straight to the left, then down to arrive at a point in teaching, that movement in actual operation would be a diagonal line.
There are many XYZ coordinate systems available to a robot. One is called the ‘base’ and is hard-coded into the robot, right where it is bolted to the ground. The directions will never change in the base coordinate system.
We will almost certainly attach a tool to the robot arm, and a new coordinate system can help us move the tool in straight lines. In fact, this ‘tool coordinate system’ may indeed be the most useful, since the tool is the only part of the robot that actually connects with the workpiece.
Finally, a custom defined coordinate system (often called, ‘user’ or ‘work’) may align with an external piece of equipment instead of the robot itself. Imagine a welding robot, where I wish to program the path according to the part in the weld jig, not just according to how the welder is held by the robot.
These linear motions will be accessed on the teach pendant as buttons labeled with X, Y, and Z, along with rotations around each axis, giving us six total buttons for this cartesian coordinate motion. It is common to toggle between all of these different coordinate systems while programming even a basic scenario, since they exist only to help the programmer get the robot from point A to point B with more efficiency.

Figure 3. End tools are simple to program; however, they require caution when testing to avoid potential collision and damage. Image used courtesy of Canva
End of Arm Tooling (EoAT) Commands
The EoAT is the part that actually clamps, welds, paints, inspects, or handles the part. Without it, the robot is useless.
Nearly all end tools, also called grippers or end effectors, require only an on/off command set. Open/close, weld on/off, or perhaps vacuum on/off.
This means that the programming of the end tool is usually quite simple. A single command line can energize or de-energize the tool at the right time.
A few cautions to be aware of when considering grippers.
-
When a robot is moving very quickly, it may take a moment to energize an air valve and actually close the jaws, and the robot may already be moving always from the part. The grip location would be changed–if it grips the part at all.
-
A second caution arises during testing, when the program may be paused and restarted many times throughout. Be sure that the robot ALWAYS arrives at the part with the gripper open, otherwise, a collision and damage may occur.
Path Planning with Waypoints
Programming the drop-off location is just as simple as the pick-up point. Careful attention to obstacles and alignment of the workpiece is critical.
On the way to the drop-off point, move deliberately around obstacles, programming extra ‘checkpoints’. These can be set in the program to simply be moving waypoints, and the robot does not actually need to stop and start at each one. Various joint speeds may allow one path of motion for low speeds, but at a high speed, the path may alter entirely. If you haven’t planned the path, the robot may run into a fixed obstacle.
Don’t make the waypoints too extreme, since any unnecessary motion will raise the cycle time and decrease productivity.
Final Elements of Programming
Depending on the brand of robot in use, there will be methods of communicating with the main control system, perhaps through an Ethernet card or by wired digital controls. Although a robot program doesn’t strictly need these, they will likely be an incredible process upgrade, allowing the robot to dynamically respond to system changes.
When first testing a robot program, keep a hand on the emergency stop button, and test first at a low speed, increasing until you are replicating the robot in action.
With patience and practice, robot programming is not only a valuable skill, but very fun and rewarding for everyone from beginners to experts!
Related Content