 Facebook
 Google
 GitHub
 Linkedin
How-To: Servo Motor Control Concepts and Programming
Learn how to control servo motors from a PLC using Allen-Bradley servos and Rockwell Automation’s Studio 5000 using a simple-to-understand method.
What Is A Servo Motor Anyway?
The job of an electric motor is to convert electrical power into rotational power with the use of a rotating magnetic field. Servo motors are a special type of electrical motor designed with self-contained closed-loop feedback systems, usually encoders or linear sensors, meaning the position of the output shaft is reported back to the control system at all times.
There are many different types of servo motors available on the market, of both AC and DC varieties. The internal workings of the motor are outside the scope of this article, we will dive into how to control our motor and what to do if the motor is not responding correctly.

Figure 1. A linear axis combined with a servo motor for motion control. Image used courtesy of Festo
Scaling
Many companies sell actuators that will accept servo motors being mounted onto them, a common assembly is a Festo ball screw linear actuator. This actuator can be combined with an Allen-Bradley servo motor and gearbox to make a complete servo axis.

Figure 2. Parameters for initializing the axis. Image used courtesy of the author.
First, we need to tell the control system what kind of properties are contained in the motor’s associated output assembly so that the software can scale the dimensions accordingly. Both the lead screw pitch and the gearbox ratio are required to properly scale the system. With Studio 5000, we can also define the units we want the axis to display. Once scaled correctly, the PLC software will tell us the actual position of the axis.
In Figure 2 above, the example axis has a gearbox I:O ratio of 1:5 revs (meaning for every 1 rev of the gearbox input, the output completes 5 revs), and a lead screw pitch of 3.5 mm for each complete revolution.
Referencing, or Homing, the Axis
Any servo application will require a way of homing or referencing the actuator. We are essentially trying to zero the position before we can command our actuator to move to a specific position, either absolute or incremental.

Figure 3. Homing against a hard stop or a sensor. Image used courtesy of the author.
One method is called home-to-torque, this requires the axis to move slowly in a single direction, typically reverse, until the axis reaches a hard stop and the controller senses a rise in drive current, indicating over-torque when the limit is reached.
Another option is to wire a sensor, either mechanical or optical, to the drive and configure an input as a homing sensor. When the homing cycle is initiated, the axis moves towards the sensor. Then, when the drive receives the signal, the position is zeroed.
Both methods have their caveats and it is up to the designer to decide which method is best suited for the application. A final reference method is to set the current position as ‘zero.’ This method is commonly used with conveyors or applications where the position rolls over.
Motion Type
There are a few different ways we can command an axis to move and each brand of servo drive will be slightly different. I’m going to use an Allen Bradley servo motor and Rockwell Studio 5000 Logix Designer software in this example.
All the move commands use a similar set of parameters. Once the move is issued, changing the parameters will not affect the move. A re-command is required to move with the new set of parameters.
Jogging moves the axis in one direction at a set velocity and acceleration and will continue moving until a stop command is issued.

Figure 4. Absolute positioning is based on a fixed reference (top) and incremental positioning is based always on the last previous position (lower). Image used courtesy of the author.
Absolute moves are commanded moves from a zero position. If you command the axis to move 10.00 mm, the axis will move until it is exactly 10 mm away from the zero position. If you command the axis with the same position again, it will not move, because it’s already 10 mm from the zero. Once the position is reached, the axis stops at the commanded deceleration rate
Incremental (also called relative) positioning moves the axis from its current position. If we command a move of 10.00 mm, the axis will move 10 mm from its current position. If we command that same move again, the axis will move another 10 mm.
Rotary motion commands will rotate the axis to a specific degree or angle. The path to this final position can be positive, negative, or shortest path.
Designing The Servo Drive Code
Now that we understand the different types of moves and how we are going to reference our axis we can start laying out our code structure. Servo drives require a lot of logic to start, stop, move, set parameters, and reset faults so we commonly put our servo logic in one or more routines, isolated from the sequence control.

Figure 5. Project tree for a servo program. Image used courtesy of the author
Every axis in the system needs to be started whenever the safety circuit or a servo fault is reset. We will also need some logic to issue a stop in the event the station faults. Parameters will require assigning, and we sometimes use a first scan bit. I like to keep this logic in a general or setup routine.

Figure 6. Ladder logic for driving servos, including a MAM (motion axis move) instruction. Image used courtesy of the author
We need to think about how many target positions we need to have.
For my own program design, I like to create a UDT with all the parameters of the move block that will change per position and call it ‘ServoParameters.’ It doesn’t matter if you are moving incremental, absolute, or rotary, the same move block is used.
I then create a tag called ‘ServoPositions’ which is an array of the servo parameters UDT. I now have an array of parameters that I can indirectly address in my logic which references the commanded position. Command position 1 would index 1 of the positions array, and all the parameters in that index would be taught from the HMI.
Servo Drive Alarms
Many alarms are standard or generic with servo drives. Typically the control system will generate an alarm code that can be searched in the documentation. I recommend using a generic servo alarm that is displayed on the HMI and reporting the device alarm code with it. Machine-generated alarms for servos are typically things like: “Not in position,” “Tooling Not Clear,” and “Command Did Not Complete.” These are alarms that are tracked internally within your control program
Command From A Sequence
Your sequence should be simple and clean so that it is easy to read and understand, try to keep move blocks out of the sequence routine. I like to move command numbers into an “Expected” tag and then use that tag as a pointer in my positions array tag. When the machine is stepped forward in the sequence, I’ll copy those move parameters into the move block and initialize the move. Once the move has been commanded, I’ll track that the axis is moving and when it completes. If the axis doesn’t reach the position, or if the axis doesn’t start moving, I can stop the sequence with an alarm.

Figure 7. HMI control for a servo movement program. Image used courtesy of the author
HMI Control
Controlling your axis from the HMI allows integrators and maintenance staff to teach positions and troubleshoot issues without connecting to the PLC. This is where your jog move comes in handy. Your axis control should include a jog forward, backward, continuous jog, and incremental jog.
When the operator is ready to save the position, use the reverse logic we used to command the axis. A pointer set from the HMI indirectly addresses the positions array, and a button on the HMI copies the entered data into the array data. You now have a fully functional servo axis system.
Servo Motion Programs
We do not always require continual feedback from the motor, so a servo is often overly complex for an application, like a pump or a fan. A simple motor/VFD combination would be appropriate. But in cases where the path and trajectory of the motion are critical, it can be helpful to understand how servo motors work, and how to program them in ladder logic.
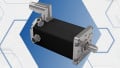
Featured image (modified) used courtesy of KEB Automation


Some important issues which must be signed out:
1. Absolute encoder is doesn’t need Homing procedure.
2. Using Index encoder pulse allows increase Zero point repeatability especially from Too-to-Tool case.
3. Over temperature Alarm is one of maun safety operation one.