Facebook
 Google
 GitHub
 Linkedin
My First Experience Programming a Collaborative Robot
We've read about the capabilities of collaborative robots, but often, one question still remains - how do you program a cobot? Last week, I got a chance to get my hands on a cobot for the first time.
When our own EETech engineering team gets a chance to try out a collaborative robot for the first time, you can bet we’ll sign right up. I’ve been programming industrial robots for many years, but after reading so much about cobots, I’ve been hoping to get an opportunity to finally try it for myself.
This time, the experience was even better because I got to bring my 7-year-old son to test the programming alongside me. If it is true that these cobots are meant to revolutionize robotics and make it accessible for people without a computer programming background, it should be easy, even for kids, to master in a fairly short time.
The Big Question - Does Reality Match the Hype?
We visited Portland Community College’s OMIC Training Facility in Scappoose, OR. This robot was on loan from the Oregon Manufacturing Extension Partnership (OMEP), part of the MEP system that supports manufacturers in every state in the US. The visit also coincided with a visit from the US Secretary of Labor, giving us the ability to explain automation and workforce training while my son demonstrated his newly-found cobot programming skills.
It should be said that this experience is not an endorsement, and it wasn’t sponsored by any cobot manufacturer. Many others exist, and more appear on the horizon all the time, and I am absolutely excited and looking forward to my chance to try some more. We also did not test the robot at work in an actual system, this is only a documentation of the initial program setup.
If you prefer the visual, skip down to the end and check out the embedded video that chronicles our experience.
Collaborative Robot Specifications
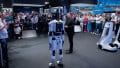
There are many makes and models of cobots, but the model in our story is a Sawyer robot by Rethink Robotics. This is a single-arm, 7-axis model, with two embedded cameras, a control cabinet with I/O, powered entirely by 1-ph 120v power, and equipped with a tablet display used for programming and for viewing operational status. This model has a 1260 mm reach and a payload capacity of 4kg.
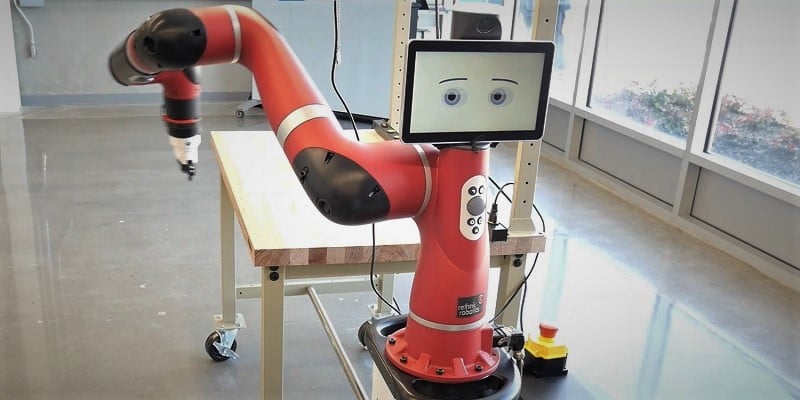
Figure 1. Sawyer cobot in motion
Teaching Points
Jogging the robot is not as precise as on a normal cartesian teach pendant, but it is much faster. The wrist and base contain a set of buttons that release the motor brakes and allow manual manipulation with minimal force - this is the circle icon button in Figure 2. The buttons also provide access to updating other instructions and executing the program.
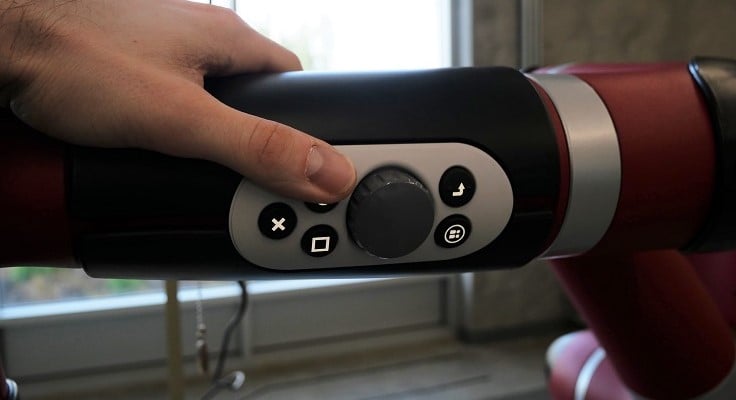
Figure 2. Wrist controls for jogging and recording points.
Since the robot is jogged manually, it is more difficult to maintain precise orientations of the tool. This is the main reason why cobots are an ideal solution for jobs that aren’t incredibly precise, or those tasks which may be able to be taught by hand.
Two common cobot case studies are welding and machine tending, where an experienced technician may manually force the robot hand into the proper position - this may be much easier than attempting to numerically calculate xyz and angular coordinates that determine how the workpiece or weld tool is to be placed.
In previous programming experiences, it has taken at least a minute, usually more to jog a robot to a proper position then record the point, even at full teach speed. In this instance, all points were recorded in a matter of seconds once we became accustomed to navigation.
If more attention to precision is required, or orientation adjustment beyond what manual motion can accomplish, the coordinates can be numerically adjusted.
For those of us who are accustomed to the deadman switch for jogging access, no such switch exists. The button on the wrist is enough to unlock the brakes and allow 2-handed control of the robot.
This sounds easy, but warning - it took me a good few minutes of twisting the joints before I felt like I could easily swing from point A to B. Attempting to coordinate all 7 axes is harder than it sounds.
Navigating Menus
Many functions, such as editing points, adding gripper commands, examining I/O data, etc must be performed for any task completion. In this model, a rotating knob navigates the correct position and subsequent menus can access these other functions. This is much like a digital radio with an encoder control knob.
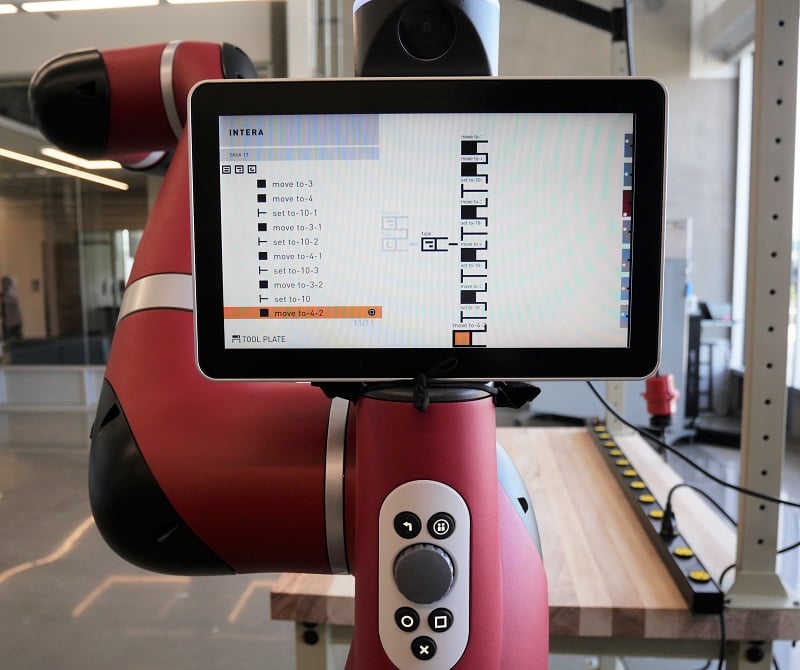
Figure 3. The touch screen displays the program in a flowchart diagram, rather than lines of text commands.
Executing a Program
The menu allows test and program execution. As expected, the test can be done in a stepwise manner, one function block at a time, or as a continuous test. The tablet displays two eyes, which display current running status, anytime the program flowchart screen is not active. Eyes awake and alert indicates a running program.
Each motion command allows configuration including motion type (linear, joint, etc) and an override speed which can further limit a single motion beyond the speed limit of the entire task.
Stopping Program Execution
An emergency stop button (or series circuit) is present in the controller for hard emergency stops. The wrist and base buttons also allow a soft stop at any time during program execution.
One of the features that sets a cobot apart is the program stop when a collision is detected. In this cobot, a force pushing or pulling on any part of the arm will send the robot into an immediate pause, but the motion will continue again where it left off. This may happen after a couple of seconds, or on a user action - all configurable in the task menu on the touch screen.
Integrated Cameras
This robot also contains two Cognex cameras, one above the touch screen and one near the wrist joint. These cameras are used for robot positioning and orientation relative to the environment outside the robot, or by the workpiece itself.
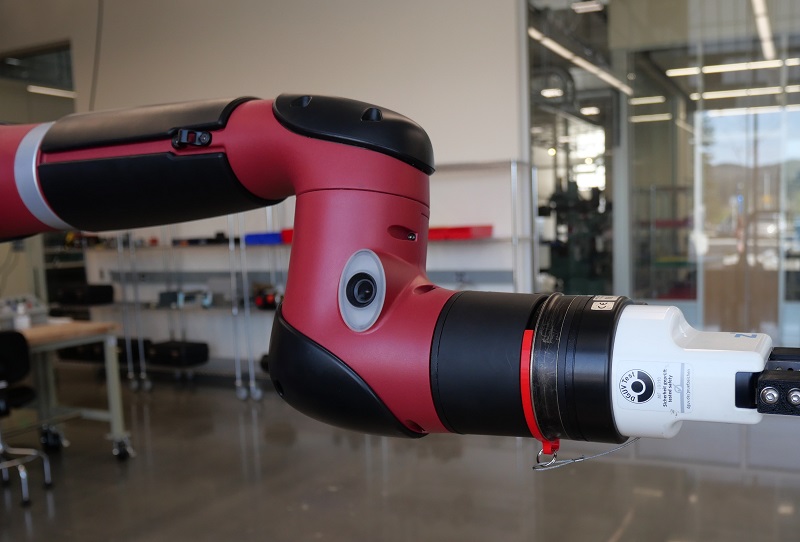
Figure 4. Cognex camera installed near the end effector.
Running the First Program
When the run command is given, the robot very slowly moves from its current position into the commanded position in the first block of the code. This allows ample time to halt travel if the path would cause a collision, as the current position may be random or far away from the first set program point.
Once the first point is reached, the robot accelerates to the commanded speed (dictated by the task overall, or by individual motion command parameters). At its fastest, the robot is still much slower than typical industrial robots, the current speed being limited by safety regulations.
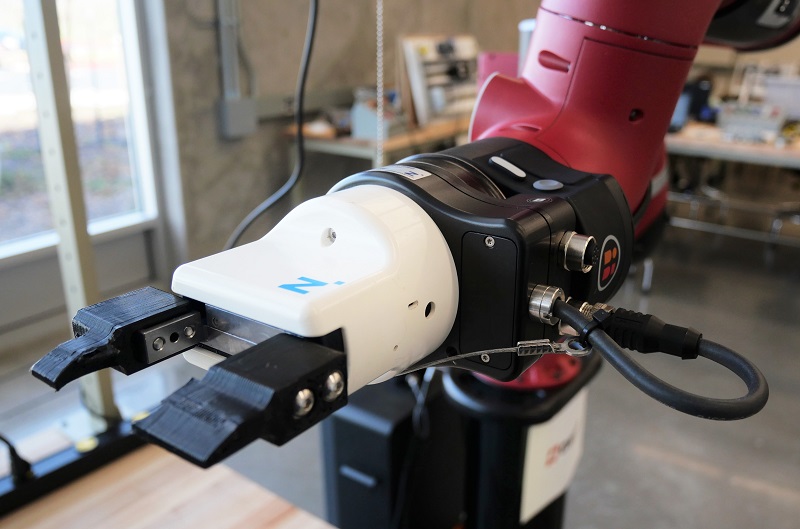
Figure 5. The gripper plate allows many different end effector options, this one with custom 3D printed claws.
Final Thoughts
All I can say is that this robot seemed to live up to what I have heard about the capabilities. This is not the only brand, and it is not the only programming method - more are appearing in the competitive market every day.
I am glad to learn a new skill and even more glad that my son was able to learn as well. This is good news for the future of manufacturing as the technology advances, and the ease of learning allows a new generation of excited technicians and engineers.
To see the entire documented experience in my own ‘home-video’ quality, watch the 5-minute video below which may be easier for those who prefer a visual experience.